(Agent‑based PNs) Add protected nodes manually
When you
enroll a protected node, onQ automatically (1) installs the onQ Service and (2) adds the PN to the onQ Portal’s list of protected nodes thereby registering the PN with the onQ Manager.
However, there are reasons why you might want to manually add a protected node to the list:
• You attempted to enroll the protected node, but the installer refused to add the node because there is not enough disk space. Remember, onQ needs disk space for both the protected node’s virtual machine (
vdisk) and the protected node’s data, which is stored in the repository. The amount needed is 1.5 x the used disk space on the protected node. If you are certain that the data will not grow, you can add the node manually.
• You want a protected node to appear in the onQ Portal’s list of protected nodes but don’t want to enroll the node yet.
• You previously enrolled this PN, but deleted it from the onQ Appliance’s configuration.
To add a protected node to the list:
1. Log on to the HA’s onQ Portal.
You can only add to the list of protected nodes when Protection is OFF.
3. Click the PROTECTION CONFIG tab.
4. Click the plus button (+).
5. From the
Add a Protected Node dialog, type the PN’s host name, and specify values for the
node parameters, then
SAVE.
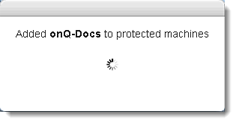
If onQ successfully added the Protected Node, a confirmation message appears:
6. From the PROTECTION CONFIG tab, confirm that the newly added protected node appears in the list.