Edit RN services list
A Recovery Node (RN) services list is a list of services that can run on a given PN. Some services installed on a PN will cause problems if they attempt to run on the RN. In this case, you can configure the startup settings for these services.
The onQ Portal provides a default RN services list that includes all known services that are problematic. For this reason, the start option is set to Disabled. Alternatively, the onQ Portal enables you to retrieve a comprehensive list of services from which you can build your own custom list.
• If a custom list exists for an RN, the onQ Portal uses that list instead of the defaults list.
• If you later delete the PN, the onQ Portal deletes the custom list for that PN.
To specify the start option for a service:
This procedure assumes that you’re modifying the RN services list for an existing protected node. However, you can perform this procedure from either the Add Protected Node page or the Modify Protected Node page.
1. Log on to the HA’s onQ Portal.
2. Click the PROTECTION CONFIG tab.
3. Select the node, then MODIFY button > ADVANCED button.
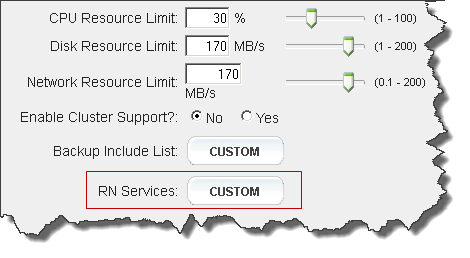
4. In the RN Services field, click Custom or Default.
When you click
Custom, the onQ Portal overwrites the values from the custom list with the values from the default list so that the known services that are problematic always default to
Disabled.
5. Do any of the following to create or modify a custom list:
| Note: If you delete all entries in the custom list, the onQ Portal assumes you no longer want a custom list and applies the default list. |
• Select an existing service from the table and Modify its start option.
• Click Extract to retrieve a list of services and settings that recently appeared in your PN’s registry. Prune and or selectively modify this list to meet your needs. This option prevents you from unintentionally misspelling a service name. If no snapshot exists for the PN, which only occurs if you added a PN and the backup is in progress, then the onQ Portal displays an error.
• In the text box, type the name of the service and specify its start option, then click the plus (+) button.
6. Do one of the following:
| Note: The onQ Portal validates the service to the extent that it checks for duplicates and blank entries. |
• Click Save - onQ Portal saves your exclude list as shown in the list, then returns you to the previous page. The Backup Exclude List: button is labeled Custom.
• Click Default - onQ Portal deletes the custom list and replaces the custom list with the default list (also known as factory default), then returns you to the previous page. The Backup Exclude List: button is labeled Default.
• Click Revert - onQ Portal discards your changes, then returns you to the previous page. The Backup Exclude List: button does not change.