Back up and restore Oracle 10g+ database on Windows
The following procedures walks you through how to back up and restore an Oracle 10g+ database on a Windows Recovery Node. These procedures assume that you are knowledgeable and comfortable with Oracle databases.
Restoring and recovering an Oracle database, after you have booted the recovery node (RN), is a unique process from that of other databases. These procedures cover the prerequisites for hot backups with Volume Shadow Copy, and the required tools developed by Quorum to recover and open your Oracle Database on your recovery node.
These procedures outline the steps to recover an Oracle database with ARCHIVELOG mode enabled and the Oracle VSS Writer service installed. Hot backups are not possible with an Oracle database using NOARCHIVELOG mode. Databases using NOARCHIVELOG mode must be put in a consistent (shutdown) state in order to perform a backup.
Recovery, maintenance and troubleshooting of Oracle databases on the protected node (PN) will not be covered in these procedures.
These procedures might not work with your specific configuration; as such, discuss your configuration with Quorum Support before you perform this procedure.
(Step 1) To prepare your environment:
1. Verify that your RN is running:
• Windows 2003 or greater
• Oracle Database 10g or greater
2. Ensure that you have your archive logs stored on a separate volume from your database (DBF) files.
Oracle requires that you put archive logs on a separate volume when performing backups with the Oracle VSS Writer service.
Quorum cannot recommend an architecture that violates Oracle's specifications. However, it should be noted that Quorum did not observe any adverse effects when putting the database and archive logs on the same volume while performing VSS backups and restores.
3. From the onQ Portal’s Protection Config tab, verify that you have the following volumes protected.
• The volume that contains your database files.
• The volume that contains the archive logs.
4. For the protected node on which you want to perform hot backups and for every Oracle database instance, install the Oracle VSS Writer service (service.msc).
The Oracle VSS Writer service is installed by default with Oracle Database 11g. Oracle Database 10g releases require a manual installation of the Oracle VSS Writer service. The installation instructions for the Oracle VSS Writer service can be found
here.
5. Configure the Oracle services:
a. Make sure Oracle is in ARCHIVELOG mode.
b. Configure Oracle VSS Writer service with the SYSDBA user, mode Automatic; then, test that the user account has SYSDBA set correctly:
> sqlplus user_account as SYSDBA |
For example:
Where sysadm_amy is the user_account.
> sqlplus sysadm_amy as SYSDBA |
c. Configure the Volume Shadow Copy Service with Local Service account, mode Automatic.
d. Configure the Microsoft Software Shadow Copy Provider service with Local Service account, mode Automatic.
(Step 2) To back up the Oracle database:
Perform the following procedure on the PN and for each database that you want to restore.
1. Verify that the Oracle VSS Writer service is running.
> oravssw /q /status OracleVssWriterORCL - The service is running. |
2. On the PN, verify that the VSS writers are Stable.
> vssadmin list writers ... Writer name: 'Task Scheduler Writer'... State: [1] Stable Last error: No error Writer name: 'VSS Metadata Store Writer'... State: [1] Stable Last error: No error Writer name: 'Performance Counters Writer'... State: [1] Stable Last error: No error Writer name: 'Oracle VSS Writer - ORCL'... State: [1] Stable Last error: No error Writer name: 'System Writer'... State: [1] Stable Last error: No error Writer name: 'ASR Writer'... State: [1] Stable Last error: No error Writer name: 'Registry Writer'... State: [1] Stable Last error: No error Writer name: 'COM+ REGDB Writer'... State: [1] Stable Last error: No error Writer name: 'Shadow Copy Optimization Writer'... State: [1] Stable Last error: No error Writer name: 'WMI Writer'... State: [1] Stable Last error: No error |
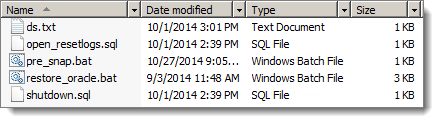
3. On the PN, unzip the Quorum Oracle database recovery
scripts in the
C:\Program Files\Quorum\usr folder.
4. Modify the
restore_oracle.bat batch file:
a. Make a backup copy of the restore_oracle.bat batch file.
b. Change the placeholder database names to match your Oracle database names. Each instance should be separated by a single space and encapsulated by parenthesis.
> set DB_INSTANCES=(database_instance_name) |
For example:
Where there are three database instances: orcl, orcl1, and orcl2:
> set DB_INSTANCES=(orcl oracl1 oracl2) |
c. Save your changes.
6. Repeat
Step 2: Verify that the VSS writers are
Stable.
8. Check the PN’s Event Log for VSS‑related errors. If there are errors, resolve them. For troubleshooting information, see the appropriate return code in
A0801.
(Step 3) To restore the Oracle database:
After the RN boots, you can now begin the Oracle Database recovery process. This process can be performed with an RN booted in test mode or production mode. Perform the following procedure on the RN and for each database instance that you want to restore. This procedure includes two ways to restore your database(s). Begin with the recommended solution.
(Recommended) Using restore_oracle.bat
This procedure uses Quorum’s restore_oracle.bat scripts. This solution is recommended.
1. With the RN, in test or production mode, navigate to the C:\Program Files\Quorum\usr folder, then run the restore_oracle.bat file completely.
You will be prompted for your database password twice for each database instance: once for a shutdown command and once for an open resetlogs command.
2. Verify that your database(s) opens without any errors.
• If the database(s) opens without error, you’ve successfully restored your database(s). You’re done!
Using “manual” process
This procedure uses a manual process to restore your database(s). This solution is not automated as is the case with using Quorum’s restore_oracle.bat scripts, which executes the same commands in the following manual process.
1. Shut down the database that you want to restore.
> set ORACLE_SID=database_instance_name > sqlplus SYS as SYSDBA SQL> SHUTDOWN IMMEDIATE; SQL> EXIT; |
For example:
Where orcl is the database_instance_name or Oracle System ID (SID).
> set ORACLE_SID=orcl > sqlplus SYS as SYSDBA SQL> SHUTDOWN IMMEDIATE; SQL> EXIT; |
2. Restore the Oracle VSS Writer’s metadata and generate the required archive log, if any.
3. Open the database for service and reset the redo logs.
> sqlplus SYS as SYSDBA SQL> ALTER DATABASE open resetlogs; SQL> EXIT; |
4. Compare the PN’s and RN’s row counts. They should match, if no changes were made after the backup.
> sqlplus system@database_instance_name SQL> select count (*) from table_name; |
For example:
Where testtable is the table_name and where orcl is the database_instance_name or Oracle System ID (SID).
> sqlplus system@orcl SQL> select count (*) from testtable; |
5. Check the PN’s Event Log for VSS‑related errors. If there are errors, resolve them. For troubleshooting information, see the appropriate return code in
A0801.
6. Verify that your database(s) opens without any errors.
• If the database(s) opens without error, you’ve successfully restored your database(s). You’re done!
(Step 4, if necessary) To fix an incomplete database recovery:
If you attempted to restore an Oracle database either manually or using restore_oracle.bat and your database(s) fails to open, you have an incomplete database recovery. This procedure includes two ways to fix an incomplete database recovery. Begin with the recommended solution.
(Recommended) Using “recover database until cancel” method
This solution uses Oracle’s recover database until cancel recovery method to fix an incomplete database recovery. This procedure is the easiest way to fix such a problem, and is recommended before attempting any other incomplete database recovery method.
1. Restart a fresh RN, in test or production mode. If you’re using restore_oracle.bat, execute that file now, but choose not to start the databases at the end of batch file.
2. Set the ORACLE_SID to the database SID. Where the SID is ORCL:
3. Start the sqlplus shell:
4. Perform the following Oracle DB incomplete recovery procedure, which uses the recover database until cancel method:
a. Execute the recover database until cancel method.
b. Verify that the suggested log file is available or specify an available archived log file to be restored, then press Enter.
If the suggested log file is unavailable or there are no archive log files, type CANCEL.
SQL> RECOVER DATABASE UNTIL CANCEL USING BACKUP CONTROLFILE; ORA-00279: change 5619127 generated at 11/18/2014 13:03:07 needed for thread 1 ORA-00289: suggestion : E:\LOGS\ARCH_863902564_1_81.ARC ORA-00280: change 5619127 for thread 1 is in sequence #81 Specify log: {<RET>=suggested | filename | AUTO | CANCEL} +++++++++++++++++++++++++++++++++++++++++++++++++++++++++++ Specify log: {<RET>=suggested | filename | AUTO | CANCEL} CANCEL Media recovery cancelled. SQL> |
5. Open the database with resetlogs:
SQL> alter database open resetlogs; |
6. Verify that the database opens successfully. The database has a new change number in the database view.
SQL> SELECT CURRENT_SCN FROM V$DATABASE; |
If the database fails to open successfully, the cause is a known bug (race condition) in Oracle’s VSS Writer. Perform the procedure outlined in
Using point‑in‑time recovery method.
Using point‑in‑time recovery method
This solution uses Oracle’s point‑in‑time recovery method to restore the database to the target time (or SCN) for recovery. This procedure is guaranteed to succeed, but is more complicated; for this reason, use it as a last resort. Perform the following procedure for each database instance.
1. Restart a fresh RN, in test or production mode. If you’re using restore_oracle.bat, execute that file now, but choose not to start the databases at the end of batch file.
2. Set the ORACLE_SID to the database SID. Where the SID is ORCL:
3. Start the sqlplus shell:
4. Perform the following Oracle DB incomplete recovery procedure, which uses the point‑in‑time recovery method.
a. Determine the missing last change number and record the last NEXT_CHANGE# value:
SQL> SELECT MAX(NEXT_CHANGE#) FROM V$LOG_HISTORY; |
Let’s assume the last change value is 118009.
b. Recover to the last change number in the last archived redo log on the RN. This value is the last
NEXT_CHANGE# value (see
Step 4) minus 1. Where the last change value is
118009, therefore, the value is
118008 (118009 -1).
SQL> RECOVER DATABASE UNTIL CHANGE 118008 USING BACKUP CONTROLFILE; |
5. Open the database with resetlogs:
SQL> alter database open resetlogs; |
6. Verify that the database opens successfully. The database has a new change number in database view.
SQL> SELECT CURRENT_SCN FROM V$DATABASE; |
If your database still fails to open successfully, contact Quorum Support.