When you enroll protected nodes, onQ automatically adds them to the onQ Manager, among other things; therefore, you don’t need to add them manually. However, there are reasons why you might want to add a protected node manually:
|
•
|
You attempted to enroll the protected node, but the installer refused to add the node because there is not enough disk space. Remember, onQ needs disk space for both the protected node’s virtual machine (vdisk) and the protected node’s data, which is stored in the repository. The amount needed is 1.5 x the used disk space on the protected node. If you are certain that the data will not grow, you can add the node manually.
|
|
1.
|
Log on to the HA Appliance’s onQ Portal.
|
|
2.
|
|
3.
|
Click the PROTECTION CONFIG tab.
|
|
4.
|
|
6.
|
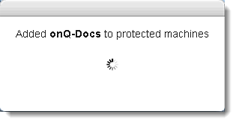
Click Yes to confirm the request.
|
|
7.
|
In the Backup Exclude List dialog, click DEFAULT. You can add backup exclusions at any time. If the File Backup Only option was selected, then in the Backup Include List dialog, click Custom. You can add or modify backup inclusions at any time
|
|
8.
|
From the PROTECTION CONFIG tab, confirm that the newly added protected node appears in the list.
|
|
9.
|
|
10.
|