When you choose to recreate (aka reinitialize/rebuild) a recovery node, onQ simply destroys the recovery node and creates a new one from scratch. Recreate a recovery node if:
|
•
|
You need to build a recovery node to test, for example, new Windows Server updates.
|
|
1.
|
Log on to the HA Appliance’s onQ Portal.
|
|
2.
|
|
3.
|
|
4.
|
Click on the RN Status button next to the recovery node, then click INITIALIZE and UPDATE button. The UPDATE button loads an updated services list (see Edit RN services list).
|
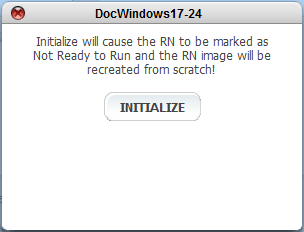
The corresponding recovery node is immediately marked as Not Ready to Run and the recovery image is recreated from scratch. The RN status icon also briefly turns solid red during this process.
|
1.
|
Log on to the HA Appliance’s or the DR Appliance’s onQ Portal.
|
|
2.
|
|
3.
|
|
5.
|
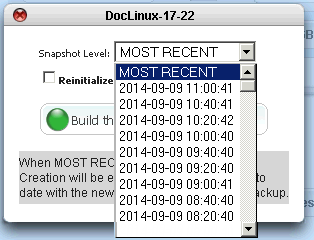
Choose a snapshot from the list, then Build the Recovery Node. Optionally, you can select the Reinitialize RN build check box to rebuild build the RN from scratch instead of updating the RN with incremental data.
|
|
•
|
If you choose MOST RECENT snapshot, onQ builds the RN to the most recent snapshot and enables Auto RN Creation. If you don’t know which one to choose, always choose the latest.
|
|
•
|
If you choose a specific snapshot, onQ builds the RN to the chosen snapshot and disables Auto RN Creation to preserve the RN state. Use this option if your latest backup is corrupt. The RN will be built with the current disk configuration for this PN. If the PN's current disk configuration changed significantly (for example, you added a disk/volume) from that of the selected snapshot, the RN won't be functional (might not boot); in this unlikely case, reconfigure the RN to match the PN's current disk configuration.
|
|
1.
|
Log on to the DR Appliance’s onQ Portal.
|
|
2.
|
|
3.
|
|
4.
|
Click on the RN Ready Status button next to the recovery node.
|
When you roll the cursor over a button in the RN Ready Status field, you see a summary of the status of that recovery node as well as the date and time the latest recovery node was generated.
|
5.
|
In the Reinitialize RN information box, click the INITIALIZE button and UPDATE button. The UPDATE button loads an updated services list (see Edit RN services list).
 |