|
4.
|
From the Control Panel, launch the Network and Sharing Center, then click Set up a new connection or network link.
|
|
5.
|
|
6.
|
|
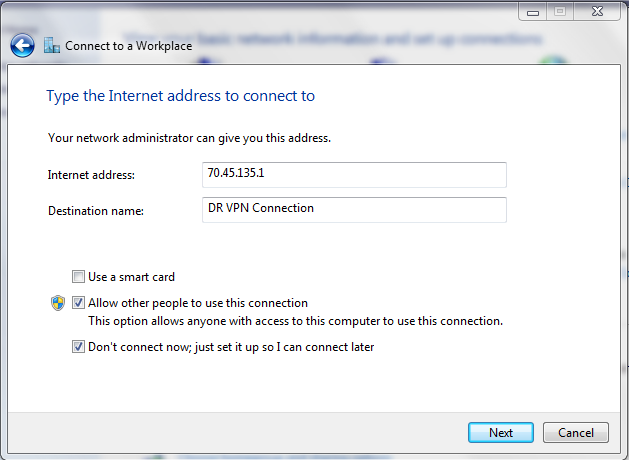
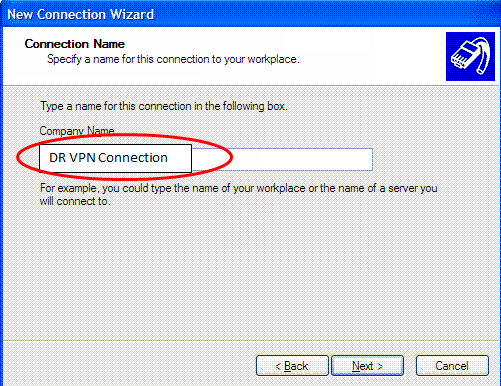
Type a name for the connection. For example, DR VPN Connection.
|
|
|
a.
|
|
b.
|
|
c.
|
|
a.
|
|
b.
|
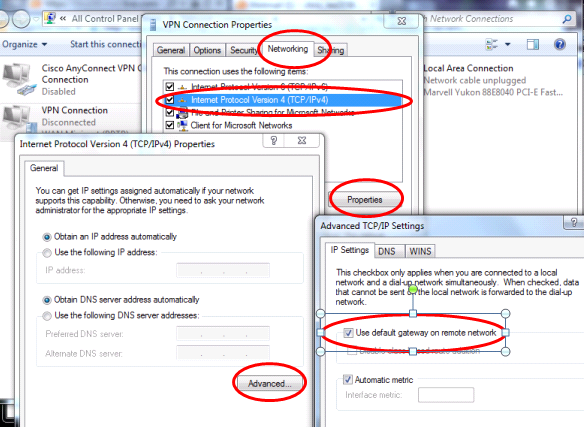
Go to the Networking tab > IPv4 > Properties > Advanced. Deselect the Use default gateway on remote network check box.
 |
|
13.
|
Log on to the DR Appliance’s web portal. From a web browser, go to https://<DR-Appliance-LAN-IP-Address>.
|
|
4.
|
From the Control Panel, launch the Network and Sharing Center, then click Create a new connection link.
|
|
5.
|
|
6.
|
|
7.
|
|
8.
|
|
9.
|
|
10.
|
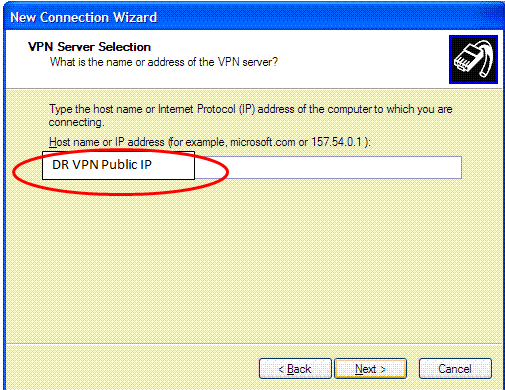
In the Host name or IP Address... text box, type the DR Appliance’s Public IP address provided by your Quorum Support Engineer, then Next.
 |
|
11.
|
|
a.
|
Click on the Properties button.
|
|
b.
|
Click on the Networking tab.
|
|
c.
|
|
d.
|
Click on the Advanced button.
|
|
e.
|
Clear the Use default gateway on remote network check box, then OK until you return to the logon window, accepting all previously defined settings.
|
|
15.
|
Log on to the DR Appliance’s web portal. From a web browser, go to https://<DR-Appliance-LAN-IP-Address>.
|
|
4.
|
|
a.
|
|
b.
|
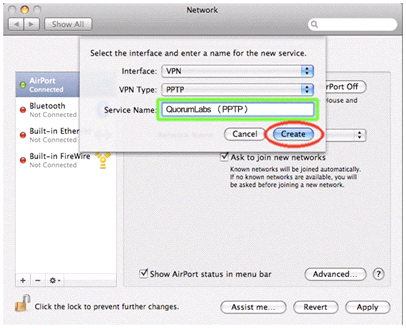
Click on the Interface popup menu to specify the properties for this new connection.
|
|
c.
|
|
d.
|
|
e.
|
|
f.
|
Click Create.
|
|
a.
|
|
b.
|
|
c.
|
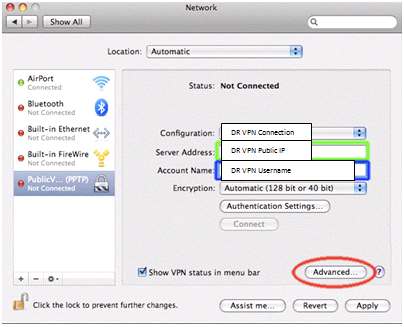
In the Server Address and Account Name fields, specify the Quorum IP address (WAN IP address) and Quorum username.
|
|
d.
|
In the Encryption drop‑down, choose Automatic (128 bit or 40 bit).
|
|
e.
|
|
f.
|
|
a.
|
|
b.
|
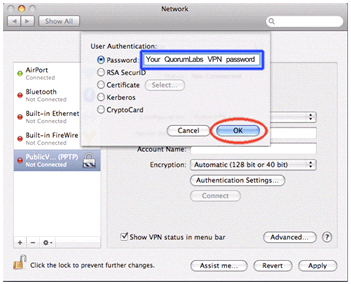
Select the Send all traffic over VPN connection check box. You must do so in order for the connection to work effectively.
|
|
c.
|
(Recommended) Select the Use verbose logging check box. This option makes it easier to see additional information in the event that you have connection problems.
|
|
d.
|
Click OK.
|
|
8.
|
Save the configuration. Click Apply in the bottom right of the Network page.
|
|
11.
|
Log on to the DR Appliance’s web portal. From a web browser, go to https://<DR-Appliance-LAN-IP-Address>.
|