|
•
|
Bare Metal Restore (BMR). You have a server failure or site failure and you want to restore a Recovery PN from scratch.
|
|
•
|
Incremental/Reversion Restore. You have a server failure and you want to restore to the latest snapshot, or you have a corruption problem and need to restore to a previous snapshot (aka reversion).
|
You can also restore PN data using two other methods: file level restore (FLR) and Windows Share Restore (WSR). These methods are commonly used in non‑disaster recovery scenarios.
|
•
|
USB. This media is used for most installs. If for any reason QUARK cannot inject the necessary drivers, you can add drivers to this USB for use during the BMR without needing additional media.
|
|
•
|
ISO. Burn this ISO to a CD‑ROM or, in the case of virtualization, save this ISO to your network and point to it from your virtualization infrastructure.
|
|
1.
|
Log on to the onQ Portal.
|
|
2.
|
|
3.
|
|
•
|
USB method. Select the Quark_usb_BCV-<release>-<date>-<time>.zip, Download, then save the .zip file to a USB key.
|
|
•
|
ISO method. Select the Quark_BCV-<release>-<date>-<time>.iso, Download, then save the .iso file to your virtualization infrastructure, or burn it to a CD-ROM.
|
In this procedure, Recovery PN (also called Recovery OS, BMR target, restore target, or simply target) refers to the server to which you are restoring. This Recovery PN can be a physical or virtual machine.
In the event of a restore failure, QUARK provides you the opportunity to resume the restore (see Step 8 and Step 12). However, this capability will not be available if you:
|
•
|
Restart protection. Therefore, do not stop, then start protection (aka restart) on the onQ.
|
|
•
|
Restart a BMR for a different PN from the same onQ. Therefore, wait for the BMR to complete before beginning another from the same onQ.
|
The Start BMR page appears.
|
4.
|
From the Start BMR page, allow the QUARK wizard to check for basic network and disk controller drivers on which QUARK depends, then Next.
|
|
Note: To manually launch the Add Drivers utility, run the following command from the command prompt:
# QUARK_Wizard.exe AddDriver
|
|
5.
|
|
a.
|
Select a NIC from the Interface drop‑down list.
|
|
b.
|
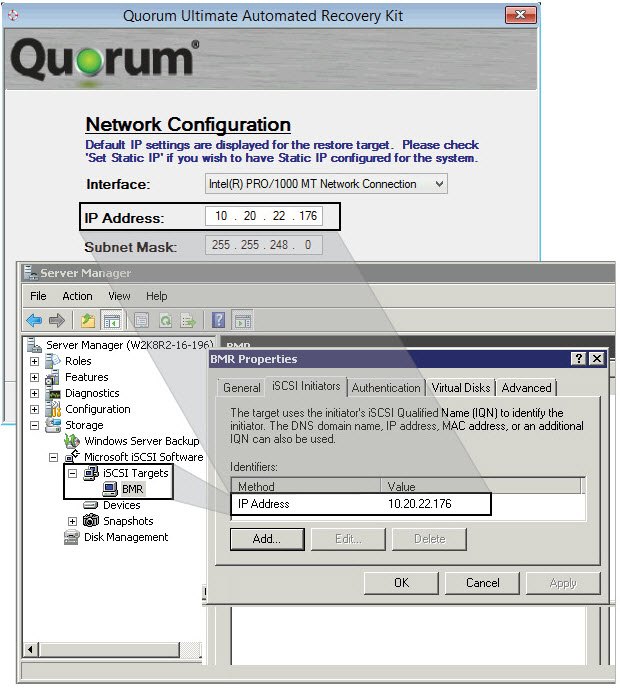
Specify a temporary IP address for the restore target. DO NOT set the IP address to the PN's original IP address; doing so prevents onQ from communicating with the restore target. After onQ restores PN data, the restore target will automatically be set to the PN's original IP address. Select the Set Static IP check box to set the default IP address to a static IP.
|
The Disk Cleanup / iSCSI Configure page appears.
|
•
|
Reset all local disks. Select this option if you intend to perform a BMR.
|
|
•
|
Skip disk reset. Select this option if you intend to perform an Incremental/Reversion or your last restore interrupted prematurely.
|
|
•
|
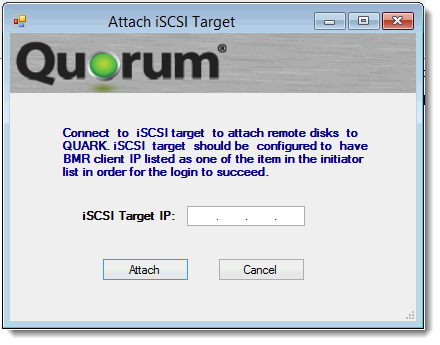
Configure iSCSI disks. Select this option if your Recovery PN has iSCSI disks. The QUARK Disk Configuration wizard launches. (1) Add QUARK (BMR target) to the iSCSI target’s initiator list, then (2) In Disk Configuration page, specify the iSCSI target’s IP address to attach the iSCSI devices to QUARK.
  |
The Log on to onQ page appears.
|
7.
|
In the Log on to onQ page, type the IP Address and credentials of the onQ Appliance that manages the Recovery PN’s snapshot to which you want to restore, then Next.
|
The onQ Appliance analyzes the snapshots that belong to the Recovery PN, and determines the restore types (Full BMR or Incremental) that are available for this recovery, then displays the Select PN page.
If this process fails, browse the list of error messages in (Step 4) To interpret QUARK Errors: to correct the problem.
|
8.
|
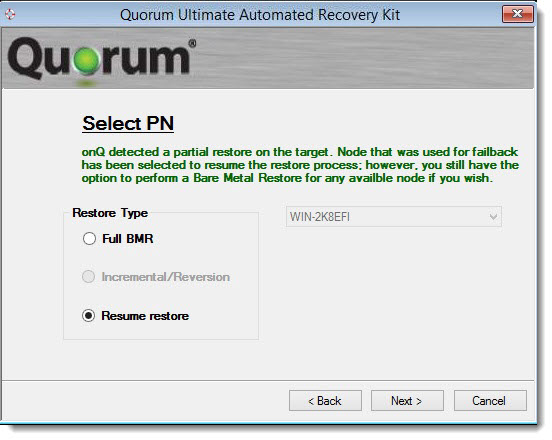
In the Select PN page, select the restore type and the Recovery PN from the drop-down list of PNs that the onQ Appliance manages, then Next.
|
|
•
|
Full BMR. Restore a Recovery PN from scratch. If the onQ Appliance doesn’t have the incremental backups that are needed to perform the Incremental/Reversion restore (that is, the PN is a new server and does not have any data on its disk), the wizard displays the Full BMR option only; otherwise, both options are available.
|
|
•
|
Incremental/Reversion. Use the Incremental/Reversion restore type to: (1) Restore to the latest version; simply choose the latest snapshot, or (2) Revert to a previous version (also known as a reversion); simply select the snapshot that represents a point in time. This scenario is ideal when you know that the latest version is corrupt.
|
|
•
|
Resume restore. Appears when onQ detects an incomplete restore (aka restore failure) on the target. An incomplete restore (see Step 12) may occur if a restore doesn’t complete within 48 hours. Choose Resume restore to resume “beginning where QUARK left off.” You also have the choice to start over.
 |
|
9.
|
In the Select Snapshot page, select the snapshot to which you want to restore the Recovery PN, then Next.
|
|
10.
|
From the Begin PN Restore page, click Next to confirm your PN and snapshot selection. The QUARK Disk Configuration wizard launches.
|
|
a.
|
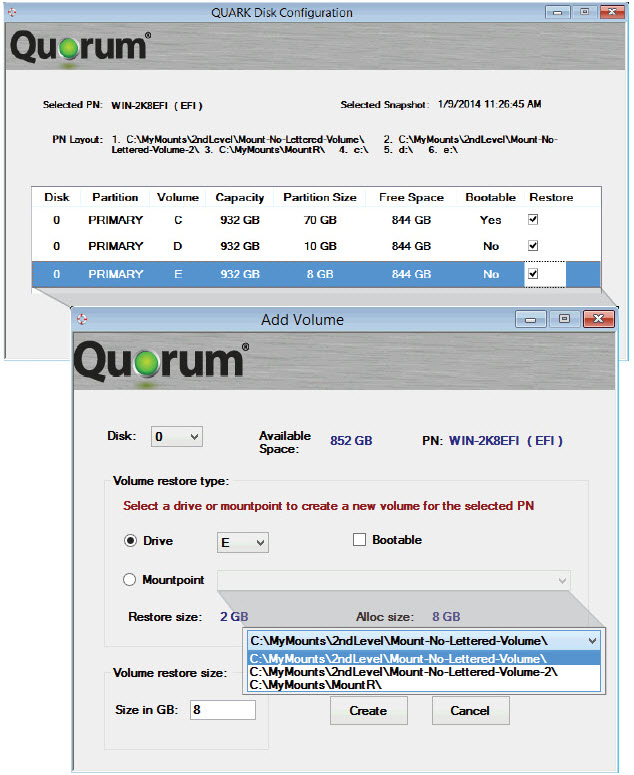
For every volume that appears in the PN Layout field, add a corresponding volume. The volume can be either a drive or a mountpoint. Optionally, you can change the Volume restore size of the drive or mountpoint; the default is the allocated size as shown in the onQ Portal.
 |
|
b.
|
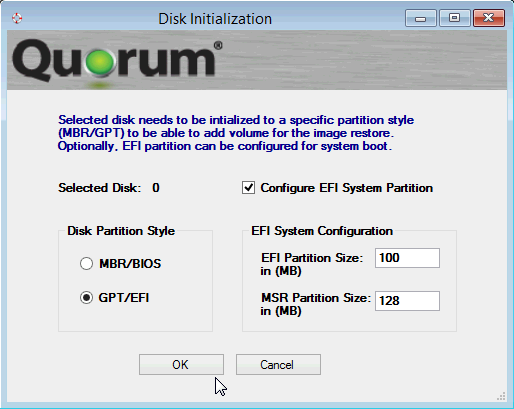
If the drive is a boot drive, specify the partition style when the QUARK Disk Configuration wizard prompts you:
|
|
•
|
|
•
|

|
d.
|
If you want to delete a volume or view volume information (for example, file system), right‑click on the volume and Delete Partition and Volume Information respectively.
 |
|
e.
|
If you receive the following error message, the volumes that you added do not match the PN layout. However, as outlined in Step c, you do not need to restore all the volumes. 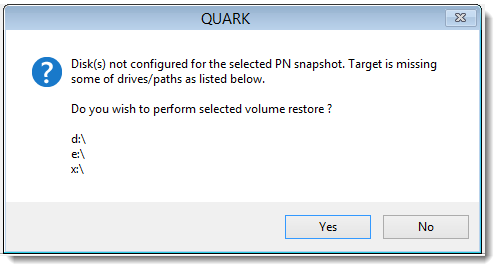
|
# QUARK_Wizard.exe showDiskConfig
|
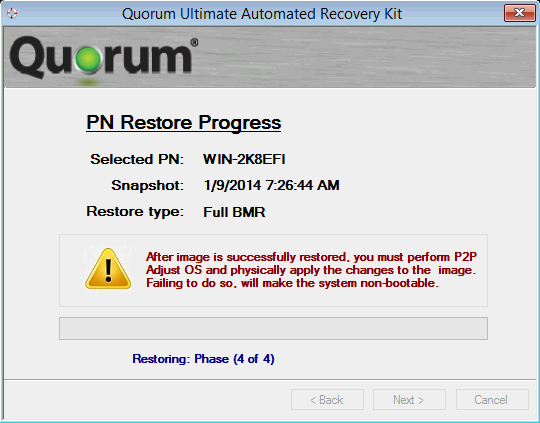
|
a.
|
|
b.
|
If QUARK does not display any errors, verify that the restore completed successfully. Log on to the onQ Appliance’s onQ Portal, then go to RESTORE > SNAPSHOTS. Locate the target snapshot that you chose. If the Status icon is red, hover‑over the icon to display the status message.
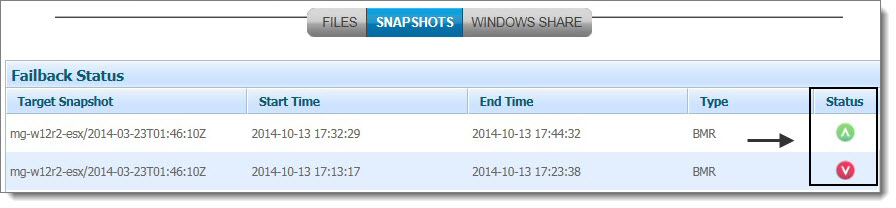 |
If the status message indicates Incomplete: Unexpected Disconnect, then you will need to launch QUARK and perform the restore again. When you select the PN from Select PN page, onQ notifies QUARK of the restore failure, then QUARK provides you the opportunity to resume the restore (see Step 8).
|
c.
|
If the status message indicates Completed Successfully and if you attached iSCSI devices in Step 6, verify that the Microsoft iSCSI initiator assigned the correct drive letters for each iSCSI device. If not, change the drive letters: Computer Management > Disk Management.
|
|
a.
|
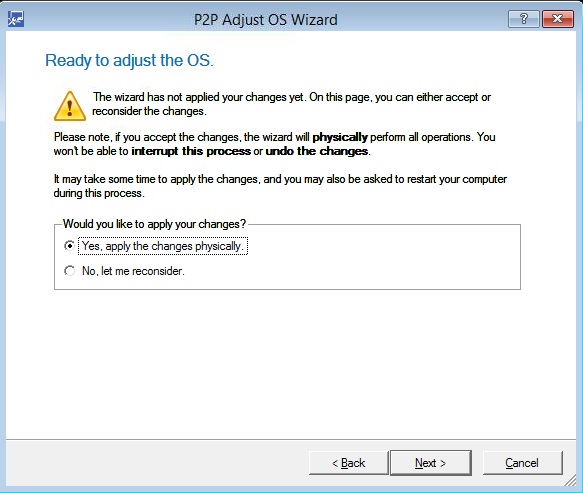
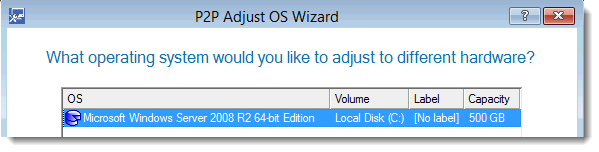
From the P2P Adjust OS Wizard, select the Recovery PN’s operating system and, when prompted, choose Adjust the OS to the new hardware automatically, then Next.
|
|
b.
|
|
c.
|
|
•
|
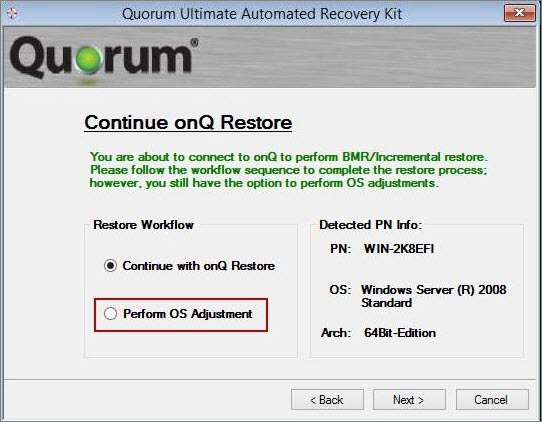
If you reboot the PN without adjusting for new hardware, you can perform the adjustments after the restore completes. Simply launch the wizard again by repeating Step 3 and Step 4, then select the Perform OS Adjustment workflow from the Continue onQ Restore page.
 |
|
•
|
|
•
|
If your PN boots, but the onQ Portal indicates a Connection Status of PN offline, your PN might have acquired a DHCP IP address, not the original static IP address. Modify the PN’s configuration to reflect its original, static IP address. Afterward, onQ can resume backups of the PN.
|
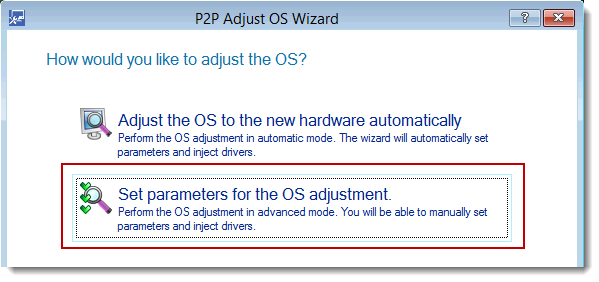
If after performing a BMR your PN does not boot (BSOD), you’re missing boot‑critical drivers. In the rare case that the P2P tool did not properly adjust your PN’s operating system for the new hardware, you need to manually adjust the operating system using the P2P Adjust OS Wizard’s Set parameters for the OS adjustment option. Before you begin, retrieve the necessary drivers.
The Start BMR page appears.
|
2.
|
From the Start BMR page, allow the QUARK wizard to check for basic network and disk controller drivers on which QUARK depends, then Next.
|
|
3.
|
|
4.
|
|
5.
|
|
6.
|
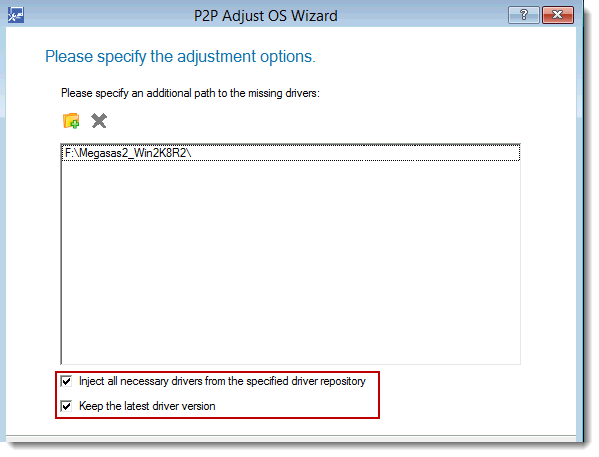
Specify the path to the driver, select the Inject all necessary drivers from the specified repository check box and the Keep the latest driver version check box, then Next.
 |
|
7.
|
|
8.
|
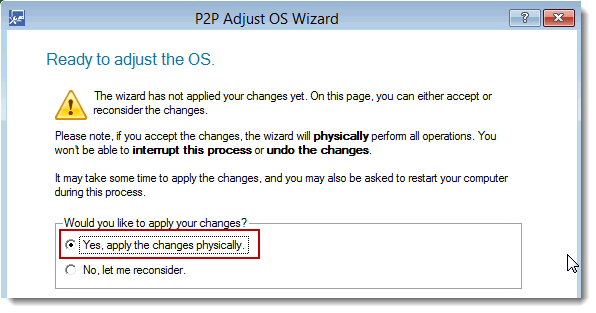
Select the Yes, apply the changes physically radio button to make the necessary adjustments, then Next.
 |
|
9.
|
|
10.
|
|
Change the IP address in QUARK’s Network Configuration page.
|
||
|
Specify the correct partition style in the QUARK Disk Configuration wizard.
|