Configure Appliance’s hypervisor settings
Except in the case of DRaaS/AVaaS, you can configure a variety of settings related to your onQ Appliance’s hypervisor, including:
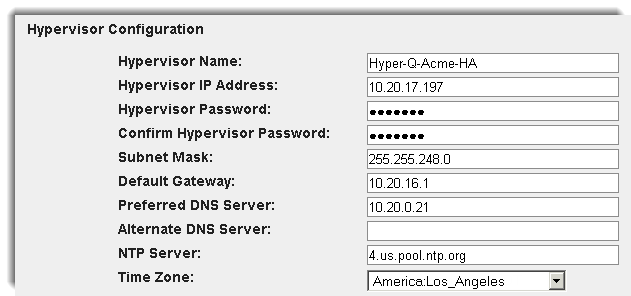
• Hypervisor name
• NIC Speed (not configurable: onQ Portal reports the speed that’s detected)
• Hypervisor IP Address
• Hypervisor Password
• Subnet Mask
• Default Gateway
• Preferred DNS Server
• Alternate DNS Server
• NTP Server (default is 0.us.pool.ntp.org)
To configure an onQ Appliance’s hypervisor settings:
Your onQ Appliance’s hypervisor is XenServer. The onQ Appliance ships with the hypervisor information pre‑configured.
The hypervisor name is based on a Quorum naming convention: Hyper-Q-CustomerName-ApplianceType. This naming convention provides you the best customer support possible because it communicates the onQ Appliance’s role and your topology.
Quorum recommends that you retain the pre‑configured hypervisor name; however, Quorum recognizes that your company might have its own naming conventions. Before you change the hypervisor’s name, contact Quorum Support with your naming convention requirements so that we can rename the hypervisor. without losing sight of the relationships between onQ Appliances.
Hyper-Q-Acme-HA | Acme’s HA. |
Hyper-Q-Acme-DR | Acme’s DR Appliance. |
Hyper-Q-Acme-DRaaS | Acme’s Hybrid Cloud. |
AV-Acme-DR | Acme’s AV Appliance, which is an archive of the DR Appliance. |
AV-Acme-HA | Acme’s AV Appliance, which is an archive of the HA. |
Hyper-Q-Acme-MT1 | One of Acme’s multi‑tenant onQ Appliances. Multi-tenancy is identified by the Configuration field under Dashboard tab > onQ Status page. |
1. Log on to the onQ Appliance’s onQ Portal. You must log on as
varadmin user.
2. Click the APPLIANCE CONFIG tab > HYPERVISOR page > MODIFY button.
The
Modify Hypervisor Config page appears.
3. Make your changes, then click SAVE.
Click REVERT to return the fields to their initial values, or click the cancel icon (at the upper left) to discard your changes and return to the previous page.