(Agent‑based Centralized PNs) Enroll protected nodes
If you have a large number of PNs to enroll, consider using the onQ centralized installation manager for the platforms specified in
Centralized Enrollment Support thereby eliminating repetitive tasks. With the onQ centralized installation manager, you do not need to log on to each PN separately to install the onQ Service.
Instead, simply configure the onQ Portal with your Windows Domain Controller account credentials. onQ centralized installation manager will then use an Active Directory GPO (Group Policy Object) to push the onQ Service software to the specified PNs and execute the install wizard for each PN. You only need to run the wizard once! This process also enrolls the Domain Controller itself.
The onQ centralized installation manager sets the node configuration parameters to reasonable defaults that will protect your PNs, but you can customize these parameters globally during enrollment or individually after enrollment.
To enroll multiple agent‑based PNs and DC simultaneously:
If you remove orphan data for a given PN from the HA—but not from the DR, then later re-enroll that same PN on the same HA, the DR fails to add the future snapshots for this PN thereby compromising disaster recovery.
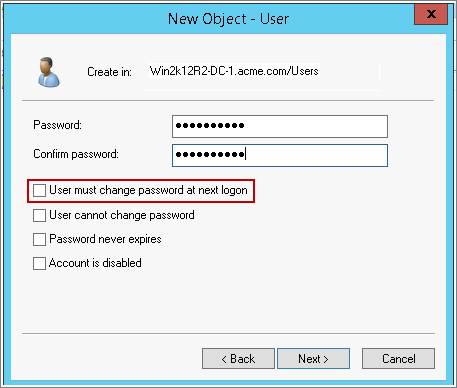
3. Log on to the primary Windows Domain Controller and create a new account to be used exclusively by onQ. This account must have root privileges:
a. Specify an intuitive user name such as
ONQDC. The first and last name entries aren’t important.

b. Clear the
must change password on next login check box.
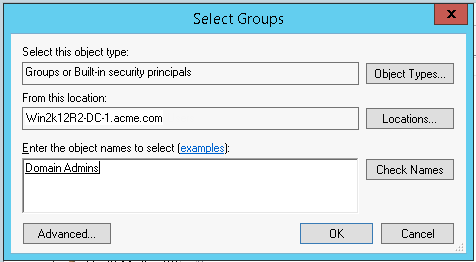
c. Right‑click on the newly created user and
add to group, specify
Domain Admins, then click
Check Names button.
4. Configure onQ to join the domain:
a. Log on to the HA’s onQ Portal.
b. Click the PROTECTION CONFIG tab.
c. Click the double‑plus button (++).
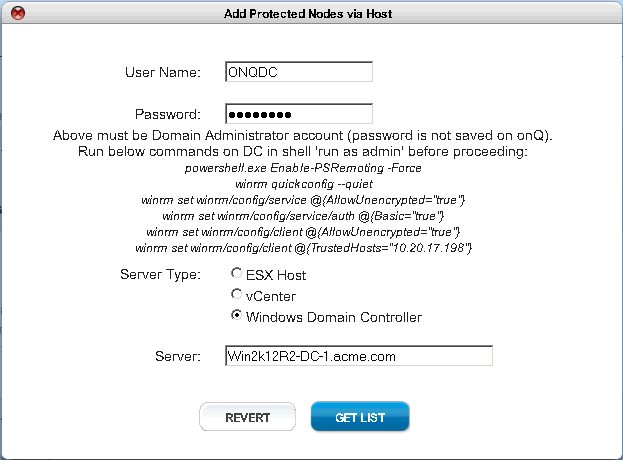
d. The Add Protected Nodes via Host dialog appears.
e. In the Server Type field, select the Windows Domain Controller radio button.
f. In the
User Name and
Password fields, provide the primary DC’s hostname or IP address and account credentials for the account that you created in
Step 3. For security purposes, the username and password will not be saved.
g. Run the list of
winrm (Windows Remote Management) commands that appear in the dialog. These commands enable the onQ Portal to retrieve a list of PNs registered with the Domain Controller and authorizes onQ to install packages on the PNs that you specify.
After enrollment, you can disable winrm. For specific instructions, contact Quorum Support.
h. Click GET LIST.
The onQ Portal retrieves a list of machines from Active Directory, then displays the inventory. You’re now ready to enroll them. Proceed to the next step.
5. Enroll the PNs:
a. Select the check boxes (or ALL button) for the PNs that you want to enroll.
If a host does not appear in the list, make sure that (1) it is joined to the domain that you specified, and (2) its operating system is supported (see
Centralized Enrollment Support).
If a host appears, but is greyed out, it’s already enrolled on this onQ. If you want to enroll a previously enrolled agent‑based PN on a different onQ using Centralized Enrollment, you must first delete the certificate on that PN; for instructions, go to
Create secure connection to PNs.
b. Click Enroll to push the onQ Service to the PNs that you specified.
6. (Optional) Make global changes to the node configuration parameters. You can always customize these parameters after enrollment.
8. Activate the PNs. Go to PROTECTION CONFIG tab > MODIFY button > SAVE button.
That’s it!