Monitor multiple onQ Appliances
Use onQ Monitor to monitor all of your onQ Appliances from a “single pane of glass”. These onQ Appliances can be located in a local datacenter or in the cloud. Think of your onQ Monitor as a dashboard from which you can retrieve information about your onQ Appliances, Protected Notes, and Recovery Nodes.
onQ Monitor enables you to click one tab or one button to:
• retrieve status information and overhall health for all your onQ Appliances.
• display alerts about all your onQ Appliances.
• display current operations being performed on PNs and jobs.
• display repository use, RN disk in use, RN disk allocated for each onQ as well as RN disk usage/allocation for each PN, providing a quick overview of capacity utilization for each onQ Appliance.
• navigate to your onQ Appliance to retrieve more status information or to browse the log files directly.
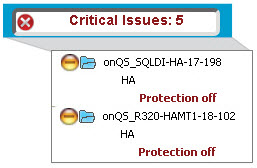
For example, from one location you can view all the onQ Appliances that have protection turned off:
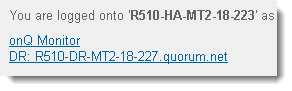
To log on to onQ Monitor.
1. Log on to the HA Appliance’s onQ Portal.
2. Scroll to the bottom of the DASHBOARD page.
3. Click on the
onQ Monitor link in the footer.
To configure onQ Monitor:
1. Log on to the onQ Monitor.
2. Add all additional HAs and onQ Archive Vaults that exist in your environment:
a. In the navigation pane, click Add/Remove button.
b. Do one of the following to retrieve the the HA or onQ Archive Vault, then Get Name.
• In the HA/AV Address text box, type the address of the HA or onQ Archive Vault
• In the Set Name text box, type the address of the the HA or onQ Archive Vault.
c. (Optional) Type a Group name if you’d like to assign the HA and its DR, DR Mirror(s), and the onQ Archive Vault to a group.
Groups help you organize your onQ Appliances. For example, you can organize your onQ Appliances by domain, subnet, or department.
By default, onQ Monitor provides a quorum group to include the HA from which you logged on to the onQ Monitor.
d. Click ADD.
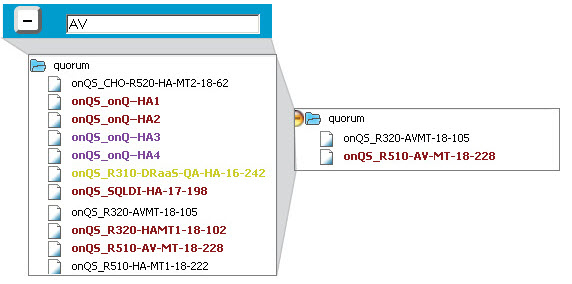
To filter on your onQ Appliances:
You can use filters to search for a specific appliance name, or if your onQ Appliances have a naming convention, you can filter on a string to search for multiple onQ Appliances. In the following example, a filter is performed on
AV string to search for all AV Appliances.
To delete a group:
When you delete a group, you also delete all the Appliance Sets (aka onQ Appliances) in that group.
1. Log on to onQ Monitor.
2. In the navigation pane, click Add/Remove button.
3. In the Group text box, type the name of the group (name is case sensitive), then Delete Group.
To browse the issues for a PN:
1. Log on to onQ Monitor.
2. in the navigation pane, click on the name of the onQ Appliance.
3. Click the Issues tab.
4. Wait while onQ Monitor requests issue information from the onQ Appliance. This retreival can take up to a minute depending on how busy the machine is and if you have a DR/DR mirror attached.
onQ Monitor displays information for each PN by onQ Appliance. Each onQ Appliance is a hyperlink.
To browse the status of a PN:
1. Log on to onQ Monitor.
2. in the navigation pane, click on the name of the onQ Appliance.
3. Click the Status tab.
4. Wait while onQ Monitor requests status information from the onQ Appliance. This retreival can take up to a minute depending on how busy the machine is and if you have a DR/DR mirror attached.
onQ Monitor displays information for each PN by onQ Appliance. Each onQ Appliance is a hyperlink.
To browse the status of a job:
1. Log on to onQ Monitor.
3. Click on the STATUS tab.
4. Wait a few seconds while onQ Monitor requests status information from the AV Appliance.
onQ Monitor displays information for each job by onQ Appliance.