(onQ Flex) Build recovery nodes
onQ creates recovery nodes (RNs) automatically if you chose the
Ready‑to‑Run build policy, or you can manually build them if you chose the
Build‑on‑Demand policy. You can build RNs in the following ways:
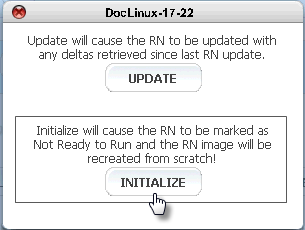
• Update. Apply deltas since last RN update.
• Reinitialize. Delete existing RN and create a new one from scratch.
To update an existing RN:
Use this procedure if you want to update an existing RN with any changes since the last RN update/build. You might need to do so if you have a disaster and the RN is outdated.
You know an RN is not up-to-date if the RN Status(HA)/RN Ready Status(DR) icon is accompanied by a red asterisk:
For an RN with a
Build‑on‑Demand policy, but where onQ previously built the RN and was not instructed to delete it, a simple update is sufficient to get to the most recent state. For an RN with a
Ready-to-Run policy, onQ with auto-update the RN; however, if you need an updated RN immediately, simply initiate an update rather than wait for the scheduler.
1. Log on to the HA’s or the DR Appliance’s onQ Portal.
2. Do one of the following, depending on the appliance that’s available:
• (HA Appliance) Go to DASHBOARD tab > PROTECTED NODES page.
• (DR Appliance) Go to DASHBOARD tab > DR STATUS page.
4. Do one of the following, depending on the appliance that’s available:
• (HA Appliance) Click on the RN Status button next to the recovery node.
• (DR Appliance) Click on the RN Ready Status button next to the recovery node.
Hover‑over help for the button shows a summary of the status for that recovery node as well as the date and time the latest recovery node was generated.
5. Click the
UPDATE button.
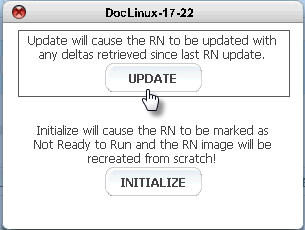
The onQ Appliance begins to update the RN as opposed to a complete rebuild.
To reinitialize an existing RN:
Use this procedure if you want to delete the existing RN and create a new one from scratch. You might want to do so if:
• You need a new recovery node to replace a corrupt recovery node.
• You need to build a recovery node to
test, for example, new Windows Server updates.
1. Log on to the HA’s or the DR Appliance’s onQ Portal.
2. Do one of the following, depending on the appliance that’s available:
• (HA Appliance) Go to DASHBOARD tab > PROTECTED NODES page.
• (DR Appliance) Go to DASHBOARD tab > DR STATUS page.
4. Do one of the following, depending on the appliance that’s available:
• (HA Appliance) Click on the RN Status button next to the recovery node.
• (DR Appliance) Click on the RN Ready Status button next to the recovery node.
Hover‑over help for the button shows a summary of the status for that recovery node as well as the date and time the latest recovery node was generated.
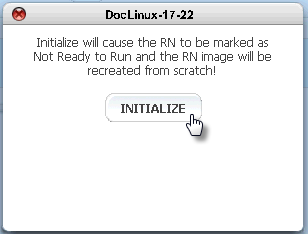
5. Click the INITIALIZE button.
The onQ Appliance begins the process of rebuilding the RN. The RN is immediately labeled as Not Ready to Run and the recovery image is recreated from scratch. The RN Status(HA)/RN Ready Status(DR) icon also briefly turns solid red during this process.
To build a point‑in‑time RN:
Use this procedure if you want to build an RN from a specific point in time because the latest backup is corrupt.
2. From the onQ Flex Manager, click the
Build the Recovery Node button.
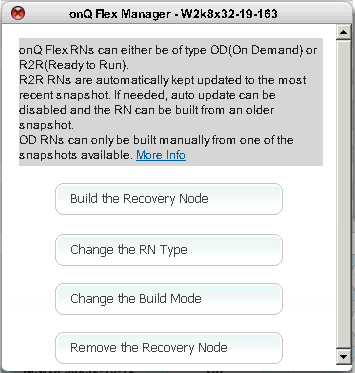
3. From the drop‑down list, choose a specific snapshot, then
Build the Recovery Node. Optionally, you can select the
Reinitialize RN build check box to build the RN from scratch instead of updating the RN with incremental data (deltas). If there are no snapshots available, this dialog does not appear.
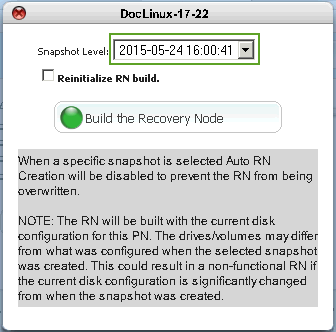
onQ builds the RN to the chosen snapshot and disables
Auto RN Creation to preserve the RN state: Ready-to-Run build policy (see
About RN Build Policies) is always tied to the
MOST RECENT snapshot; therefore, onQ disables
Auto RN Creation so that onQ does not default to
MOST RECENT after the next backup. The RN will be built with the current disk configuration for this PN. If the PN's current disk configuration changed significantly (for example, you added a disk/volume) from that of the selected snapshot, the RN won't be functional (might not boot); in this unlikely case, reconfigure the RN to match the PN's current disk configuration.
To build an initial RN:
The amount of space required appears in the Space Required column. The RN Space Available is shown just above the Unlock button.
2. From the onQ Flex Manager, click the
Build the Recovery Node button.
If you have an onQ Flex configuration where the RN type is
OD, and you have
never built this RN before (aka
initial build), the following dialog appears, with the
Reinitialize RN build check box selected by default; however, the
Reinitialize RN build check box is unchecked by default for all future attempts to build that RN so as to instruct onQ to retain the existing disk and build the RN from deltas, resulting in a faster recovery.
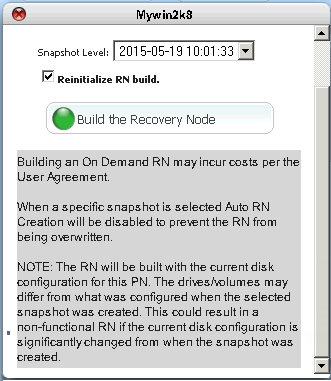
3. From the drop‑down list, choose among the snapshots listed, then Build the Recovery Node. The Reinitialize RN build check box is selected by default so as to build the RN from scratch instead of updating the RN with incremental data (deltas).
If you don’t, have enough disk space, onQ states that there’s
insufficient disk space. Go to
Remove recovery nodes.