Remove recovery nodes
You might need to remove (aka delete) a
Build‑on‑Demand RNs to free up disk space. Each RN uses nearly the same amount of disk space on the onQ Appliance as is used on the PN.
If there is not enough disk space on the onQ Appliance for an RN that you want to build, you must remove one or more existing BoD RNs. (You cannot add disk space at this time without reinstalling.)
Deleting the RN does not affect the corresponding PN.
(onQ On-Site/onQ Prime /onQ Plus) To remove a recovery node:
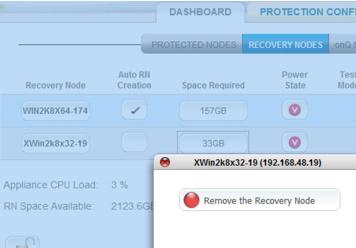
1. Log on to the HA’s onQ Portal.
2. Go to DASHBOARD tab > RECOVERY NODES page.
3. Click on the Space Required button for the recovery node that you want to delete.
4. Click the
Remove the Recovery Node button.

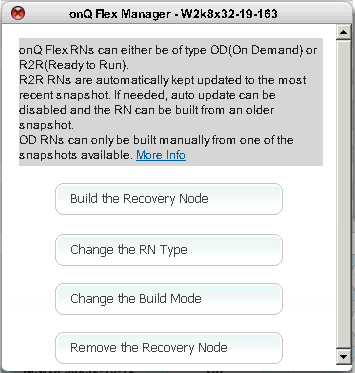
(onQ Flex) To remove a recovery node:
2. From the onQ Flex Manager, click the
Build the Recovery Node button. The following dialog appears.
You might see one of the following messages:
Error: May only manually remove RN if Auto RN Creation disabled: 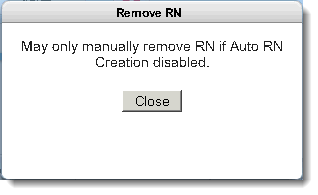 | Your RN’s build policy instructs onQ to make the RN immediately available upon request. onQ cannot do so if you delete the RN. To eliminate this contradiction, you must change the build policy. |
Error: No RN exists to remove: 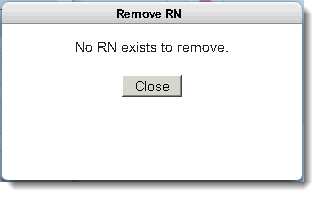 | In an onQ Flex configuration where the RN type is OD and was never formerly R2R, you will never have RNs. |
3. Click the
Remove the Recovery Node button.